Showing posts with label MAC cosmetics. Show all posts

Monday, August 10, 2015

Top 4 Ways To Take Your Look From Day to Night

When fab beauty resource blog SheKnows reached out wanting a few tips on how to transform daytime makeup into a nighttime ready look, I was more happy to share!  (They shared just one of my tips, but here's the entire article for ya!) I often have VERY long days, and find myself working all day with clients and then heading off to a networking cocktail party or industry event with just a few minutes to spare....I definitely use these tips in my own routine too!

Here are my 4 quick ways to take your look from Day to Night:

Start with a Classic Bold Lip - One of the oldest tricks in the book for a reason...it works! Stash an ultra glamorous lip color to take an otherwise neutral look into cocktail party territory. This works especially well if a strong lip is NOT your usual look! It's a bold shift that signals "sexy and special".... perfect for a night out! A shade that works on nearly everyone is a deep berry, but a classic crimson or a winter-perfect burgundy are elegant picks too. 

A few of my fave evening ready bold lip colors are "Hellbent" by Kat Von D, "Snow White" by NYX, "Shame" by Urban Decay and "Rebel" by MAC)

Highlight the Positive - A shimmery highlighter dusted on cheekbones and brow bones instantly gives your face a lift, and picks up candle light beautifully!  Add a bit down the bridge of your nose and on cupid's bow for a fresh look perfect for nighttime. Highlighters to try - Kevyn Aucoin's "the Celestial", Mac "Silver Dusk" Powder and IT Cosmetics in "Hello Light".


Photo Credit Stephen Moleski
Get in Line - an inky black liner instantly adds an air of sexiness to an otherwise subdued daytime face. Choose a pencil...easier than liquid, and doesn't require a brush like gel liners. Line water lines (bottom...and top if you can swing it) then smudge with a q-tip, the whole process takes seconds and is really hard to screw up!
Choose a soft, highly pigmented pencil for a sultry effect.
My fave black liner pick for a no-brush-needed application?  Urban Decay 24-7 Pencil in Perversion ---it's pretty much the pinnacle of smoky black eye pencil! 


Grab Your Falsies - False LASHES, that is! They're not just for black tie
anymore...nothing gives your eyes fluttery impact like popping on a pair of false lashes. And when applied properly, they really aren't too over the top...promise.  Practice at home to get technique down so you can do it quickly when trying to get out the door to after work cocktails. Bonus tip - stash a small tube of dark tone glue! The white glue will eventually dry clear, but the dark tone glue is immediately invisible, perfect if you're pressed for time. Try Eylure Lashes in "Volume" and Duo Dark Tone Glue, both available at drugstores.

Add a bold necklace or earrings, switch out flats for pumps and lastly, ditch your big work bag and tuck necessities into a cute and colorful clutch...done! You just went from all business daytime meh to sultry evening A-mazing! What are YOUR fave day to night tips and products?!?
Photo Credit Express


Want to check out the SheKnows article with tips from celebrity makeup artists and other beauty pros like me?  Click here....

(PS, If you weren't already aware, SheKnows is a great resource for anything you want to know on beauty and style....you'll get addicted!)


Thursday, March 5, 2015

Foolproof One-Step Eyeshadow that Works on Everyone...Really!

When I teach lessons and classes, women always tell me that they are overwhelmed with makeup....so many brands, so many types, so many techniques....just too many choices.  That's great for special nights out when you want to experiment and do it up, but for everyday, most women want a simple and quick go-to that always works, no fuss, no muss.  Makes sense, right?  Well ladies, you came to the right place...I have your foolproof plan of action for a simple, easy eye makeup routine that takes seconds, but still looks great!

                                                                 Pinterest.com

SIMPLE DAILY EYE
Start by choosing a neutral shade in a shimmer formulation....bronze, gray and taupe work best! Taupe...or a cross between bronze and gray, works on everyone because it isn't too warm or cool, and the color will automatically adjust to your skin tone.  Bonus....these shades look great with any eye color too!

Apply shadow over lid area up to brow bone and blend well so there are no edges.  Use your finger or a medium size shadow brush to blend.  No need to apply in the crease, you're aiming for a soft wash of overall color.  See how simple this is?!?!  No need for 12 rainbow shades, if you want to keep it quick...this one shade will get it done!

Add a little black mascara and poof, you're ready to go!  If you want more definition, you can add a little black liner like in the photo above, but you don't have to.

A few things to note:

- Choose a shade that isn't too warm (orange) or too cool (frosty or blue looking) for the most flattering effect
- Don't choose a shade with glitter...shimmer and glitter aren't the same!  Shimmer consists of very tiny shimmery particles blended seamlessly into the shadow pigment, glitter is chunkier particles that you can clearly see.  IMO, glitter should be saved for costumes, halloween, cheer competitions, drag shows and Las Vegas.  Ok, MAYBE a girls night out, but you get the idea....it's generally not a good choice for a daytime, natural look. ; )
- Since you're only using one shade, be sure to blend well...no lines!
- Choose a powder, or consider a cream formula.  Cream formulas are super long lasting and don't need eyeshadow primer...again, be sure the shimmer in a cream formula isn't too obvious.

Here are a few of my favorite shades at different price points, but it's not important to choose these specific ones...any similar shade will work.


                                                   MAC Cosmetics - Satin Taupe

                                                     "Barlust" - bottom left corner
                          From the Urban Decay "Smoked Palette" - Sadly, Discontinued!
A closer look at "Barlust" from Urban Decay

                               Maybelline "Bad to the Bronze" - a great cream shadow option!

So there you have it...a super quick eye that anyone can master, with no worries that you picked the wrong color for your skin tone or eye color.  Have fun finding your perfect "one stop shop" shade and tell us what it is!  Everyone can use a new favorite. This eye look  really couldn't be any easier! Simple and quick without sacrificing looking polished and pretty......AND out the door in a flash in the morning.  I think that's a win-win-win!!!!

Tuesday, March 25, 2014

Behind the Scenes - Film Noir/ Roaring 20s Shoot at A&M Gardens

Holy Great Gatsby!  I did a photo shoot Sunday night and all kinds of vintage fabulousness ensued.  I've done a Great Gatsby/20s style shoot before, but that one was light and feminine, with a  blond model.  This one had a totally different feel...a brunette model, much darker makeup, a handsome "groom", and amazing lighting that allowed the photographer to create an edgy/moody vibe.  But first, hair and makeup!  Here's what went down:


                                                            Our model, Jenny....

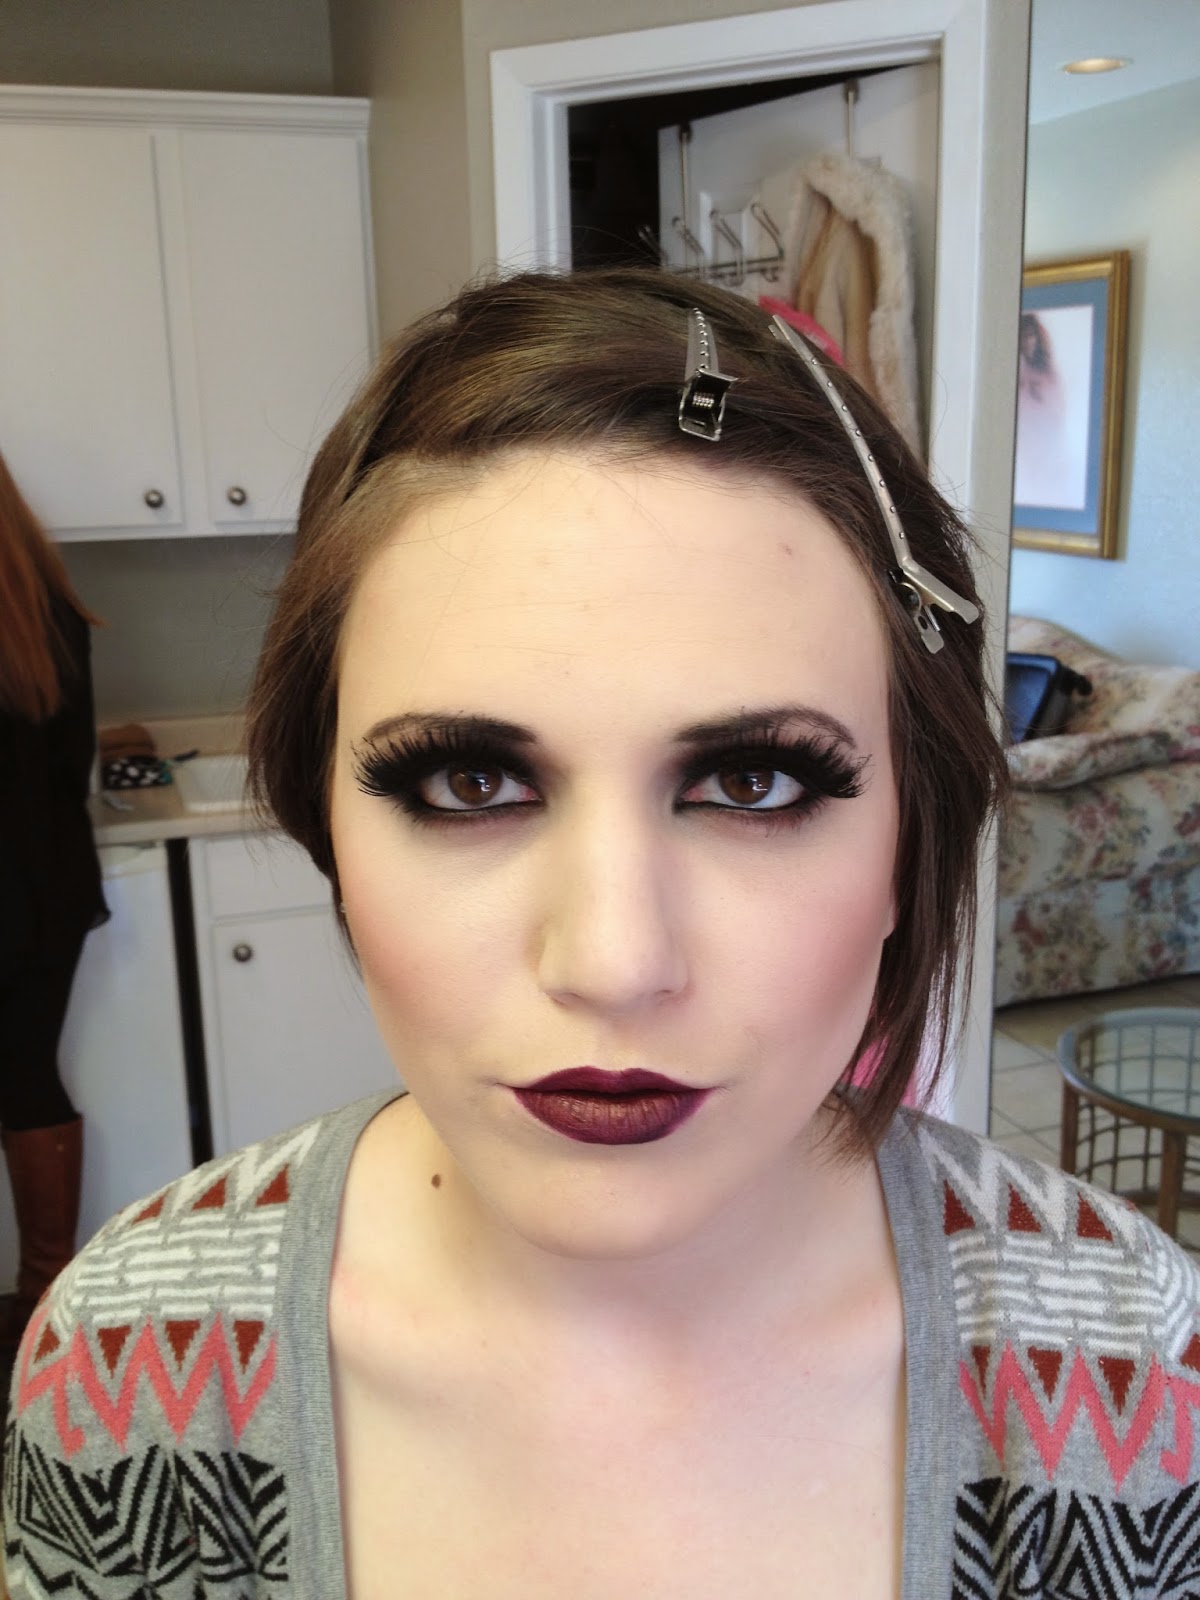
                                                      Creating a major smoky eye....
                                                      Almost done, did a quick test shot.....

                                                 And done!  Makeup is ready to go......

I used a TON of products to create this look, but basically I used a mix of black, gray, brown, taupe and burgundy/red shadows to create tons of depth and dimension in the 20's smoky eye, plus tons of black liner and the biggest lashes I had in stock to go with the extreme, over the top glamorous look.  I sculpted her cheeks with contour powder, defined and darkened her brows and added an oxblood/burgundy lip shade topped with a tiny bit of shadow for a plush look.  Love it! I get super excited when the image I have in my head is exactly how it turns out.  With makeup like this, it's 100% about the context, lighting and photography...I wanted to make it historically accurate, but yet push the boundaries a bit so it would photograph well.  With makeup done, I sent Jenny over to my #1 hair gal, Renn Traylor to create a flirty 20's look reminiscent of Clara Bow:


We also did hair and makeup for our handsome groom, Hunter and then we started shooting just as the sun went down.  Ian Miller of MVision Photography captured some GREAT shots.  The bulk of them will be published at a later date, but here are a few images to give you an idea.  I love everything...the models rocked it, the lighting, the mood even the vintage car....all of the elements really came together.  The old Hollywood glam headshot of Jenny that Ian captured (see below) may be one of my favorite images examples of my work...EVER.  Can't wait to see the rest of the photos...so exciting!


Check back for more photo shoot images in the coming weeks!

Photography - MVision Photography
Makeup - Jennifer Trotter, Lip Service Makeup
Hair - Renn Traylor, Renn Does Hair
Dress - Bliss Bridal
(Other elements not pictured are paper goods by Lauren Blake Paper, cake by Kakes by Kay)