Thursday, March 10, 2016

Brows 101.....A Step by Step Guide to Filling in Your Brows (Lip Service featured on SheFinds.....)

When Lisa Fogarty from SheFinds reached out and asked me for the lowdown on brows....heck yeah, I was happy to contribute!  My clients constantly tell me that they have NO IDEA how to fill in their brows, and they get even more confused by Instagram and YouTube gurus who draw on some MAJOR brows that can be well....scary. So how do you enhance them....naturally?  Here's my step by step guide as featured in this article on SheFinds......
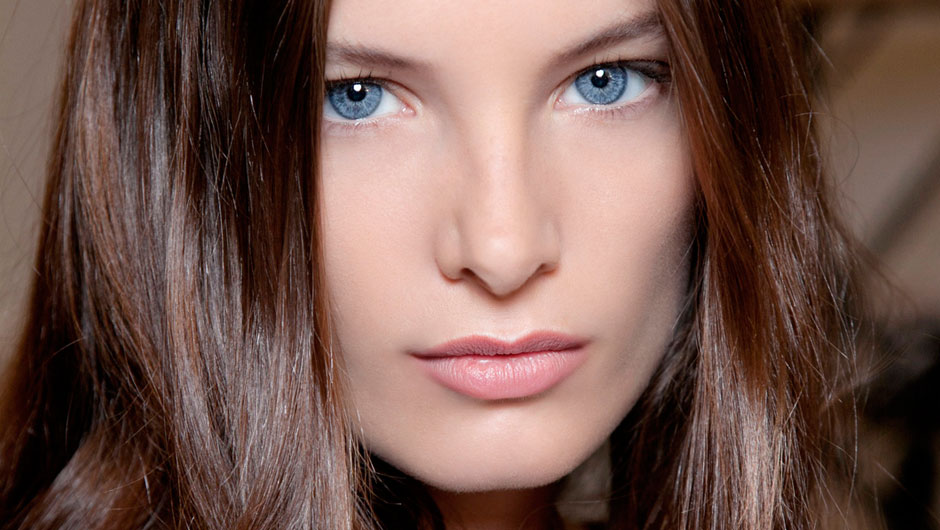
Photo credit: Maxtree
Can we all agree, once and for all, that drawn-on eyebrows are not a good look? Achieving gorgeous brows takes commitment and patience, not whatever makeup pencil you happen to have handy. In addition to letting eyebrows grow, brow-savvy beauties know just how to fill in their arches with makeup so that they look natural, not fake. Need a few pro pointers? Makeup artist and beauty expert Jennifer Trotter of Lip Service Makeup is here with the only step-by-step guide to filling in our eyebrows you’ll ever need so they always look seriously stunning–not severe.
1. Assess your shape. There is no one universal paradigm for how to fill in your brows. The tools you choose and how you use them all depend on your brow type and the specific issue you want to address. Here are the general rules for different eyebrow types:
– If you have fairly full brows with a well defined shape, you’ll want to fill in the few bare spots for a bit of polish. “Use brow powder–it’s the most natural approach and it’s easy to use. Just apply the brow powder that matches your shade using a small, dense, angled brush and mimic hair-like strokes,” Trotter says.
– If you have full brows with hairs that stand away from your skin, use pencil or powder and experiment first to see which works best, Trotter says. Then follow the same steps as you would for full brows. For added drama, Trotter suggests using a bit of pencil with powder on top.
– If you have very thin brows that need to be filled in and your eyebrow hair is dense and close to your skin, use pomade. “This is the trickiest of all the options, but works well with this brow type,” Trotter says. “Choose a waterproof pomade, apply with a dense, angled brow brush using short and careful strokes. Don’t draw it in a line! Use a concealer brush with a tiny bit of concealer on it to clean up and soften edges.”
– If you have very thin brows with longer brow hairs that stand away from your skin, use a pencil to create hair-like strokes, then a bit of powder on top. “The pencil is needed to create the brow structure and fill in missing spots. Using a thin brow pencil in a shade that matches, draw short hair-like strokes. Once you have the shape in place, apply a bit of brow powder using a small angled brow brush. The powder will cling to the hairs that are there and make it look more natural,” Trotter explains.
2. Perfect your technique. Mimic short, hair-like strokes when applying any brow product.
Makeup: Jennifer Trotter, Photo Credit: Charla Storey
3. Pick the right product. Choose a brow product that matches the shade of your brows or one shade darker. Additionally, you should choose products made specifically for brows. Eye pencils and eyeshadows can often have the wrong formulation–they’re too creamy or too dry. Products made specifically for brows have more staying power and the control you need.
4. Go slow. Take your time and don’t rush through your brow makeup application. Bad brows will ruin your whole look, so it’s best to go slow instead of piling on product.
5. Use the right tools. Use a brow brush that is small and angled with densely packed bristles for the most control and best results.
6. Prep your brows.  Brush your brows up and into place before applying any brow products, and again after you’ve applied them for the most natural look.
7. Correct mistakes. Use a concealer brush with a tiny bit of concealer as an “erasing” tool–it can clean up lines you’ve messed up, soften a line that’s too harsh, and can be used lightly on your entire brow to soften a look that’s too dark.
8. Don’t forget to cleanse! Always remove your brow products when you cleanse your face, and don’t forget to scrub your brows. Pencil, powder and pomade can build up in your brows and create dead skin and a messy look.
Of course, no guide would be complete without a list of no-no’s, so here are 3 things Trotter says you should never do when filling in your eyebrows:
1. Never drastically alter the shape of your natural brows. Just like you shouldn’t over-tweeze a naturally full brow, you don’t want to overdraw naturally thin ones. If they’re naturally thin, it’s okay to fill them in a bit, but don’t overdo it.
2. Never use brow products the way you would a pen or pencil. Don’t draw a line. It’ll never look natural and it’ll look really bad if your line is uneven.
3. Don’t choose brow products in a color different than your own.  If your brows are a light brown, a dark chocolate brown brow will look harsh and throw off the balance of your face.  The most goof-proof shade is a medium taupe that can work on almost anyone.
And....bonus! Here a few of my favorite brow products:
Photo credit: Essiebuttons.com


Pencils - MAC brow pencils (Fling is great for blondes, Stud is awesome for brunettes)
               IT Cosmetics Brow Power - a neutral taupe pencil that works on nearly everyone

Powder - Senna Brow Book (My kit staple! Find your perfect shade in this long-lasting powder)
                Anastasia Beverly Hills Brow Powder Duo - two shades in each compact to mix for your perfect match

Pomade - Anastasia Beverly Hills Dip Brow  - Chocolate is a great shade for warm brunettes

Brow Brush - Makeup Forever Angled Brow Brush
                       MAC Cosmetics #208 Brow Brush
                       (Look for a brush with an angled tip and short, dense bristles)

Thanks so much to Lisa Fogarty and SheFinds for featuring my tips!!  Check out SheFinds daily for all the beauty lowdown you need to look and feel fabulous.....


Wednesday, March 9, 2016

5 Quick Tips for "Spring Cleaning" your Makeup Bag

We've all done some spring cleaning, right?  You finally sweep the dust bunnies from under furniture, you scrub baseboards and Febreeze EVERYTHING that doesn't move...and even some things that do.  AH....done.  Or not quite?

What about your makeup bag?
If it's been a while and your makeup bag is looking like this one (eek!), it's time to spring clean that too!  So, here are...


1. BUY A CUTE NEW BAG
Dump the one that's covered in crumbled eyeshadow and has a broken zipper...you deserve better!  In fact, this was one of my fave tips that I contributed to this article for the Today show on ways to break out of your beauty rut.  You'll be surprised at how a brand-new, fabulous makeup case will revive your beauty routine and make it fun to get started in the morning!  Choose one in a fun color or pattern that  you love, and one that's big enough for what you need so items don't get squished.....

2. TOSS THE OLD
Broken eyeshadows, anything that you haven't used in 6 months or more, shades that don't work on you, worn out brushes, makeup with too much glitter, and empty lipglosses. For mascaras, glosses and lipsticks....if they smell weird or are dry and clumpy, it's time to toss.  I get that this part is hard for a lot of us, because makeup is expensive and you want to get the most of what you purchased.  But remember this...if it's past the expiration date and doesn't look good, smell good or make you FEEL good to use it, then in the words of Elsa....LET IT GO!

3. CLEAN WHAT'S LEFT

It's really important to keep your makeup and tools clean to keep germs at bay, but also for optimal performance....especially brushes. Wash brushes using a solid brush cleanser like Blender Cleanser....run under warm water (pointing down, always), swirl bristles into cleanser and gently manipulate to remove build up, then rinse, squeeze with a paper towel, reshape and dry. (Click here to see more about cleaning and storage of your Beauty Blenders!) To dry, lay brushes on a towel with bristles hanging off the end for maximum air circulation, and keep clean between washes with a spray brush cleaner. Don't forget to sanitize any metal tools with alcohol, wipe all palettes and compacts with a makeup remover wipe.

4. ADD NEW GOODIES
The fun part!  Replace the stuff you tossed...get new eyeshadows and blushes to replace the broken crumbles, and pick up that fun new lipstick you've had your eye on as well as a bright blush perfect for spring.  Pick up new mascara...you know you need one!  Need to up your brow game?  Now's the time to pick up a new eyebrow pencil or pomade and add that step to your routine. Get a new bottle of foundation and quit using drops left in the cap!  (Yes, I'm talking to you...) If your brushes and sponges have seen better days, replace those with new versions too.  With spring coming, be sure you have the right color foundation, and a few glosses to switch out from your heavier, winter lipsticks. There are great options at every price point, and many ways to save....even on higher end brands!  For drugstore cosmetics, check out CVS's Extra Care Beauty club for buy one, get one 1/2 off sales, and cash back points on beauty purchases.  For higher end brands, take advantage of racking up reward points with Sephora's Beauty Insider Program and Ultamate Rewards from Ulta.  

5. ENJOY!
Whether your routine is concealer, mascara and lip balm or involves 16 steps and just as many brushes, having the right products that are easy to use, clean and in good shape will make it more fun to get ready in the morning. Why not make putting on your face enjoyable?  And BONUS...when you have everything you need and ready to go, it's also faster...at least enough for one snooze cycle on your alarm.  Make a resolution to keep it up too! You don't have to wait until next spring to revamp your bag, just repeat these steps anytime your beauty gear starts to look a little cruddy.

Want to learn more?  Spring is a great time to book a lesson!!!  Revamp your makeup bag, your brushes and tools....even your entire look.  If you live in Dallas/Fort Worth and have always wanted a personalized makeup lesson, now is the time!

Click here, email me at lipservicemakeup.com or call 972-345-0655 and you'll be on your way to learning everything you ever wanted to know about makeup! And check back, I'll be posting more about lessons and classes soon.....


Happy Spring!

Sunday, February 7, 2016

Over 40? These makeup tips are tailor-made for you! (SheFinds Feature)

So...you're over 40....do you really need to do your  makeup differently?  The answer is...yes! Many of the same looks that worked when you were younger may not be the most flattering now, so at the minimum, you'll want to make a few adjustments.  I'm in my forties too, so when fab beauty/lifestyle blog She Finds asked me for tips to share, I had plenty...working with my clients AND from personal experience!

Read on to find out what YOU could be doing wrong, as well as some great tips to help you choose the best products for your gorgeous, over 40 self....

(PS, thanks for the feature SheFinds!!)

9 Makeup Tips Women In Their Forties Should Commit To Memory

Large Editorial Image


It’s really no secret that women in their twenties do not face the same skincare challenges as women in their forties. That’s the beauty of aging, right? So just as your style and sensibilities evolve as you get older, so should your daily makeup routine. When you’re 20, you can put just about anything on your face and get away with it, but that’s probably not that case once you hit 40. Luckily, Jennifer Trotter of Lip Service Makeup, pro makeup artist and beauty expert, and Kate O’Brien, founder of Alima Pure, are here to share their best tried and true makeup tips for women 40 and over.


1. Look for highly pigmented products. “You can use less product and still get color payoff,” Trotter says. “The older we get, we don’t want to pack on makeup, so this tip is important.”
2. Be careful with color choice. “Avoid dull or overly vivid colors,” Trotter says. “Right in the middle is where you want to be. Rosy/peachy/plum shades for lips and cheeks always look young and fresh.”
3. Less is more. While coverage is good, more is not always better, O’Brien says. “Moisturize well, and let it absorb thoroughly before applying foundation. Then apply with a light hand, going back over spots that need a little extra coverage without over-applying.”
4. Prime your lids. “Matte and (surprise!) shimmer eyeshadows often work better for eyes over-40 than pearly eyeshadows which can emphasize lines,” O’Brien says. “A touch of primer or BB cream on the lid before shadow application can help shadows stay in place.”
5. Skip trends. “Trends, for the most part, have the reverse effect and can make you look older,” Trotter says. “Giant drugstore brands quickly jump onto trends to capture their audience, but be wary–often, these products are not geared towards those over 30 and should be skipped. Examples include super vivid colors, the spiky lash trend and glitter. Subtle shimmer is fine at any age, but glitter where you can actually see the particles… NO. Watch out for this in shadows, blushes, highlighters and lipsticks,” Trotter says.
6. Choose emollient products. “Seek out products that plump and moisturize and avoid anything that is too dry,” Trotter says. “A too matte lipstick is aging, a too dry eye pencil will drag and pull on your eye, and a too dry foundation won’t give you that seamless glow.”
7. Focus on brows. “This is a great time for strong brows,” O’Brien says. “A well defined brow can help a face of any age look bright and awake. Choose a color somewhat lighter than natural brow hair and work soft strokes in through the natural brow line.”
8. Beware of cheap eyeshadow. “Across the board, watch out for drugstore brand shadows–they just don’t cut it.,” Trotter says. “The reason is because the ratio of filler to pigment is too high, which results in not enough color, not enough staying power and a dry, chalky look, which is aging.”
9. Shop smart. Smashbox, Lorac and Laura Mercier are all great brands for women in their forties because they offer colors with plenty of boldness, but not too many over the top choices, Trotter says. “Their lipsticks and shadows are highly pigmented, which is really what you want at any age.”
Mineral makeup brands like Alima Pure are also great for women in their forties because the colors reflect those occur in nature and all of the products are made without harsh chemicals like sulfates and parabens.
Lastly, IT Cosmetics is actually geared towards women 30 and up, Trotter says. “My favorite products include No. 50 Anti-Aging Primer because it plumps up and hydrates mature skin, Bye Bye Redness Correcting Creme for covering blotchiness, Brow Power Universal Eye Brow Pencil to build up sparse brows and Your Skin but Better CC Cream, which is an emollient tinted moisturizer that is fabulous on dry skin, plus it has SPF 50 to protect you from the sun. Even better, all of the skin products are formulated with good-for-you ingredients, which is a definite must for beauty shoppers over 40!”
(Written by Lisa Fogarty for SheFinds)

Thursday, January 21, 2016

Go Nude! Essential Tips for the Perfect Nude Lip That Won't Wash you Out....(SheFinds Feature)


Large Editorial Image

When Lisa Fogarty from  fab beauty blog SheFinds reached out to get the lowdown all about nude lips...I was happy to help!  As a pale girl, I've struggled with nude...do it wrong, and you'll look pale and wan, not chic.

So what's a girl to do?  Read on for the interview and you'll be rocking a nude lip like a pro!

How To Wear Nude Lipstick Without Looking Washed Out

LISA FOGARTY
JANUARY 21, 2016

Certain lipstick shades have big personalities. Red requires little more than a precise application technique to look smashing. Hot pink or coral–similar va-va-va-voom factor, similar ease. The same, however, can’t be said for nude lipstick, which I’ve always considered the most difficult hue to pull off. The wrong nude lip can make some of us look tired and washed out. What’s more: it isn’t always easy to achieve the delicate balance between a nude lip and the makeup on the rest of your face.
To help pull off the nude trend that’s sweeping the Internet, makeup artist Jennifer Trotter at Lip Service is here to offer solid advice on how to create an amazing, flattering nude lip look that will make you look ethereal… not exhausted.
SHEfinds: What are some of your best nude lipstick application tips?
Jennifer Trotter: Here are three:
1. Exfoliate first. Lighter colors really highlight any dryness, so be sure to exfoliate lips with a sugar scrub (I like Fresh Brown Sugar) or even a rough washcloth to remove flakes, then coat lips with a moisturizing lip treatment (I like Joeur’s version).  Let the moisture soak in while you’re doing the rest of your makeup, then blot any excess before applying lip color.
2. Use lip liner. Line and then fill in lips with a nude lip pencil similar to the color you’re using. This will give your lip color extra staying power and it won’t bleed into any fine lines.
3. Choose color carefully. This is crucial to a fab nude lip. Get it wrong and you’ll look like an extra from The Walking Dead.  My rule of thumb: choose a nude with a rosy undertone instead of a flat beige, particularly if you have a lighter skin tone. That slight rosy undertone will keep your nude lip neutral and fresh with just enough warmth to not make you look washed out.  If you have a lot of natural color in your skin (think Beyonce and Jennifer Lopez–the pinnacle of nude lip wearers), you can go more beige-nude.
SF: What specific nude lipsticks do you recommend?
When you consider a nude lip shade, avoid shades with flat brown or taupe undertones. They may be trendy, but they’re easy to get wrong and can suck the natural color right out of your complexion.
SF: Should nude lips be matte or glossy?
JT: I prefer my nudes on the glossier side–too matte can look dry and aging.  A nude gloss looks great on top of any lipcolor, and can neutralize the shade a bit.  Nude glosses to try: Butter London Lippy in Tea with the Queen and L’Oreal in Barely Nude.
SF: How should you adjust the rest of your makeup to suit the look of nude lipstick?
JT: Add a bit more blush for warmth, and ensure your foundation is flawless. Without the contrast of a brighter lip, any skin issues will be more obvious.  You can’t go wrong with the classic combo of a smoky eye and a nude lip. Go super smoky with shades of carbon, charcoal and bronze paired with a nude lip. Add fluttery lashes and this sexy look is tough to beat, yet not too over the top.
SF: Should your clothing choices change when you wear a nude lip?
JT: Be sure that you’re choosing an outfit in your most flattering colors when you rock a nude lip to avoid looking washed out.  If ivory makes you look pale, then pairing an ivory sweater with nude lip will have friends asking if you have the flu. Choose colors that make you feel strong and powerful… cobalt, red, charcoal, black, white. Nude lip looks are fab against all white on darker skinned ladies–see: Beyonce and JLo again.
[Photo: Imaxtree]

Tuesday, September 1, 2015

5 Reasons Why Hiring a Cheap Makeup Artist is a HUGE Mistake

Image: Lydia Royce Photography

If you are about to hire a makeup artist for your own wedding, or know someone who is getting married soon....this post is for you, and it's important! Bear with me...I know it's a little long, but I am going to tell you THE REAL DEAL.....the BS FREE, full truth reason why onsite bridal makeup and hair costs what it does, and why getting a cheaper deal is actually a huge mistake.  But first, I'm going to share with you a real story about a real bride to be....I left out her name for her privacy, but this conversation is a pretty common one. The original exchange prompted a great discussion within the DFW makeup community, and my peers actually requested that I blog about it! I agreed, because this is what brides really need to know to make an informed decision when planning their beauty budget for their wedding. 

It all started with a bride to be who was shopping for a makeup artist.  After getting a couple of quotes, she posted this message on her Facebook page:

"Can anyone help me find a good hair and makeup artist?  I just got a quote for $2300 for 11 people!! I didn't plan on spending over 2K for natural makeup and hair that isn't even pinned up."

My friend tagged me in the post, referring me to this bride and asking if I could help her.  I sent this Facebook message to her:

"Hi ________! Thanks for accepting my friend request! I got a notification that _________ referred me to you for bridal beauty per your inquiry? Sounds like you have sticker shock, which I completely understand....there isn't much information out there on what are industry averages for bridal hair and makeup in Dallas/Fort Worth. I have actually been asked to give some speeches (one is next week) to wedding vendors in other categories to help educate their clients! $2300 for 22 services is very reasonable for our area. The very bottom end for pros....and these are girls who are new and just starting out...would be $75 per service, at the higher end is $200 per service. Most of the well known pros who are my peers (as well as myself) charge roughly $150 per service for bride, $100 per service for attendants, not including extras like travel (usually added if its' over 25 miles), trial runs, or assistants due to such a large group. 

 The only way you'll find less expensive services is to use people who don't run a bridal beauty business....people who work at makeup counters, blow dry bars, etc. These people generally don't have the same level of experience, and can't provide the flawless results you want, delivered in a seamless and stress free way. Pro makeup artists like myself have majorly invested in our businesses....I have over $25K worth of product invested in my kit/tools/etc., and that's not even including items like makeup wipes, lashes, etc. that I go through in bulk each year. I spent $1400 on lashes last year alone...it adds up, for sure! Add in insurance, marketing, education and other business expenses, as well as the actual time involved in consulting, creating contracts, handling payments, and the event itself....any artist who charges less than the minimums I mentioned cannot make a living, that's why it's a dead giveaway that they aren't a pro if they charge less. Hope that all makes sense! I am happy to send you pricing if you like...I don't know your date or if I'm open, but mainly I just wanted to take the time to give you the info you need to make a good decision. it's not cheap....great bridal beauty is an investment, but a worthwhile one. You and your girls will enjoy a fun and stress free day getting ready with people who know exactly what to do to make everyone happy and stay on schedule, plus you'll all look and feel fabulous. You'll love your photos and video, and you won't be focused on anything other that enjoying every moment of the day...because you'll look amazing! If you go the cheaper route, you are risking major regret....awful makeup and hair, an artist being late or not showing up, or not getting everyone done and running late because they don't specialize in weddings and the necessary timelines....all real things that can and do happen.

 Also, your post mentioned natural makeup and hair that's down (not pinned up), neither makes a difference in regard to pricing. Fabulous natural makeup takes the same amount of time (sometimes more) than more dramatic looks, and same with down-do's....updo's can often be faster than curling and doing down-do's. Pro's don't charge different prices according to the look you desire, it's standard across the board, because what you're paying for is a culmination of experience, time and product, and there isn't much difference between softer natural looks and dramatic ones. Personally, I have been a pro makeup artist for 25 years, specializing in weddings for 20....I've done over a thousand of them, currently over 100 each year. I am passionate about bridal beauty....I love what I do! I use licensed and very skilled hair contractors for my brides who ask me to provide hair services, and I focus on my area of expertise, which is bridal makeup! You can check out my work at LipServiceMakeup.com, Facebook, Instagram.....it's all over, lots of images for you to see, plus lots of articles I've written on wedding and beauty tips. Regardless of anything, I'd love to have you as a follower on social media if you enjoy what you see. If you want more info on my specifics for your wedding, then please email me at lipservicemakeup@gmail.com. If not, no worries at all....like I said I just want you to have the correct info so you can have amazing wedding day makeup, whomever you should choose to hire. I wish you all the best _______!! JT"


Sorry, that's really long, but I need to say more than "that's just what it costs", right?  I don't know about you, but I'm willing to pay for something better, especially when I really understand WHY it's better. (Yes, I drove my parents nuts with "Why" questions when I was a kid!  No different as an adult....give me the REASON.) I wasn't really concerned about her booking me personally...honestly! I just wanted her to feel confident that the pricing she'd been given was indeed legit, and that she'd be going down the wrong road to hire someone who charged a lot less. If you're getting married....next week, next year or 5 years from now....this is info you need to know, and they don't really talk about it in bridal magazines or blogs. Hear me please when I tell you...YOU GET WHAT YOU PAY FOR. Bridal beauty is not the time to bargain shop! As you read these points below, do keep in mind, this happens to be about choosing bridal beauty, but everything listed would apply to any wedding vendor you're considering.  Cheap prices...meaning anything well below the industry standards...are NOT a good thing. Why?
   Let's recap the top 5 reasons:
Image: Credit.com
  1. Cheap often = inexperienced. You'll find cheap rates at blow-dry bars or volume beauty services.  I love an inexpensive blowout on occasion too, but I guarantee you the top bridal beauty experts in your city aren't working at a blow dry bar or an uber cheap mobile beauty service! Those options are where new people go to get their career started. Nothing wrong with that, but let's face it...you don't want a brand-new artist using your face and your wedding as an experimental training ground.  Choose someone established, experienced and trusted by your venue/planner/photographer...they're worth it!
  2. Cheap and Shady are only good when describing sunglasses! An artist who undercharges could also be undercutting local competition to steal business.  This means they know better, but are a jerk with shady ethics...they're willing to treat others poorly and don't care about their reputation.  Do you want to trust a jerk with making sure you look your best on wedding day?  (Short answer....um, NO.) 
  3. They're Cheap because they're desperate.  This ties closely to #2....artists charging very low prices might be cheap because they are desperate for business and will accept ANYTHING, even if it's well below typical rates.  Think about it...if they were talented and reputable, they would have full schedules and wouldn't be desperate. 
  4. Cheap means they are most likely a hobbyist. You can't make a living as bridal makeup artist charging really low rates....period. I'll say it again YOU CAN'T MAKE A LIVING CHARGING CHEAP RATES.  Done correctly, this is an expensive business....quality cosmetics and skin care, tools and brushes, bulk supplies, insurance, education, marketing, etc. Any artist who takes their bridal beauty career seriously regards it as they should...a small business, with the artist as the owner.  Legitimate artists who have crunched the numbers and charge appropriately do so because they actually do bridal makeup for a living! They are invested in their career...and invested in their reputation within their local wedding community.  Cheap prices are a dead giveaway that they are not an established, pro makeup artist.  Don't hire someone who does bridal makeup as a once in a while hobby!  Regardless of how they might try to frame it up to make some cash, someone who plays with their Caboodle and practices contour along with Youtube videos in their bedroom and someone's cousin who's "pretty good at makeup" is NOT a makeup artist, and they definitely are not capable of handling the most important makeup you'll ever have done. There is no chance for a do-over!
  5. An artist who charges below market rates doesn't value their work.  If they don't value their time and expertise, why should you? Think about it. Super low rates convey pretty clearly that they don't think their makeup skills are up to par...why would that be ok with you as a customer, especially on your wedding day?!  Rates well under market rates are a sign that the artist doesn't regard themselves as a skilled artist who's worth it. Conversely, a talented and experienced artist knows that they can deliver, and has confidence that they're worth their rates! That's the person you want in charge of making you look fabulous on your big day.

We all love a good deal...myself included!  There's nothing like the excitement of finding a pair of $250 shoes on sale for $100, or getting a good deal on your new cell phone......I get it completely. But in the land of bridal hair and makeup....going cheap is a HUGE risk that you'll regret.  Just ask anyone who DID go cheap....you'll hear stories of artists not showing up, makeup so bad it had to be washed off and the bride had to reapply herself, the artists taking so long that the bride was late to her own wedding...and on, and on and on. (I heard a particularly shocking story recently...that might turn into a separate post!) I've lost track of how many last minute brides I've squeezed in because a fly by night makeup artist bailed at the last minute or never showed up. Don't go that route...it's not worth the stress! On-site Bridal Beauty Pros know exactly how to create perfect, long-lasting looks....and get everyone done on time.  Don't accept anything less for an occasion as important as your wedding.  Make your choice based on style, personality, reputation, portfolio, referrals, good reviews.....not price.  If you choose someone based on price alone, you're wasting the money you do spend!

Now, you might be thinking....what if I don't live in Dallas/Fort Worth, how do I know what my market rates are so I can find a legit artist in MY area? Pricing does vary...it's less is smaller cities, and quite a bit more in places like New York and LA. Check back with me here, I have a future post in the works with tips on how to shop for a makeup artist and how to check someone out before you even call or email them. (Plus there are a few more helpful tips here.) Reviews and websites are great, but they don't tell the full story....I've seen many a shady vendor with a fabulous website and great online reviews.  One of the best things you can do? Talk to trusted wedding planners and photographers in your city.....no one understands the value of flawless bridal beauty more than these vendors, and they can point you to reputable artists who specialize in bridal beauty and charge appropriate rates for your area. They work with artists each week and know who can not only whip out beautiful makeup and hair, but who creates a great environment, keeps things on schedule....and who doesn't. Trust me, there are bound to be dozens and dozens of trusted, experienced and talented professionals where you live that charge what they do...because they're worth it.
Image: Jessica D'Onofrio Photography


Back to the bride whose inquiry started this whole thing? I felt better just knowing she had the FULL SCOOP, and I think she did wind up hiring one of the girls she had already received pricing from, so hopefully my message helped her feel more confident in her decision. Mission accomplished!  SO....let's wrap this all up with a little bow....

Ladies, you have one chance...ONE....to look and feel like a million bucks on your wedding day.  You want to not only look amazing in person, but also in the photos and video that you'll cherish for years to come.  I said it in my message to that bride and I'll say it again....


"Bridal Beauty is an investment, but it's worth it!"


Still have questions?  Did you or someone you know go the cheap route with your bridal beauty and regret it?  Share in the comments!

(All Makeup on this page, and on this website by Jennifer Trotter of Lip Service Makeup)

Copyright Lip Service Makeup 2015